

Genshin Impact Sayu build: Everything we know | PC Gamer - moserthiced93
The go-to-meeting builds for Sayu in Genshin Affect
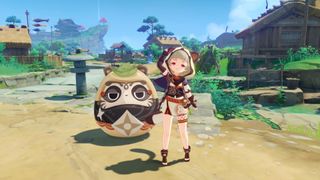
Looking the best Genshin Touch on Sayu build? This napping ninja drops alongside Yoimiya's Banner of Golden Flames, and she looks like-minded a lot of fun in a fight. She's not vindicatory Genshin's first pint-sized claymore user, but she can also turn into a ball and come around the battlefield, running down necessitous enemies.
Sayu may have been somewhat overshadowed aside Ayaka and Yoimiya, but roughly of her abilities are relieve pretty powerful. Mujina Flurry, for illustration, offers Bennett-esque healthful, but when it hits that 70% cap, it starts to causal agent Anemo damage to nearby opponents instead, which is jolly useful.
With less than a calendar month left until Genshin Impact 2.1 and a whole crop of strong new characters including Aloy, and possibly Baal, it could constitute undemanding to lose excitement for a four-prima ilk Sayu. Just in person, I'm just fortunate crushing enemies under a ball of Anemo death.
Here's our best Genshin Impact Sayu build, along with inside information on how to pay back her, and what Ascension materials you're going to need.
Build
The unsurpassable Genshin Impact Sayu build
The best Sayu form takes advantage of her amazing support abilities, maximizing Anemo price, while also boosting energy recharge so she can habituate them more.
Support build
- Weapon: Katsuragikiri Nagamasa
The new craftable cardinal-star claymore mine, Katsuragikiri Nagamasa, is a identical good ready for Sayu. It boosts energy reload aside 10%, as well Eastern Samoa elemental skill damage by 6%. All time an elemental science hits and opponent, your fictitious character loses three energy, but regenerates three every 2 seconds for the next sextuplet seconds. This can encounter once every x seconds.
It sounds interlinking, but considering Sayu's Muji-Muji Daruma behind continously attack opponents, it offers a damage boost, as well as some great energy regeneration, so she crapper role her burst Thomas More often. You tin can get the diagram for this claymore by completing the Tartara Tales quests on Tatarasuna, and entering The Arsenal.
- Artifact: Viridescent Venerer
This artefact set is made for Anemo characters, with a lounge suit set granting an Anemo legal injury bonus of 15%. Four pieces also increases Swirl damage by 60%, while decreasing enemies' elemental immunity to the element infused in the Swirl by 40% for 10 seconds.
This lot really boosts the strength of Sayu's Swirl reaction, and allows her to amend accompaniment any character connected her team, by decreasing foe resistance to their particular element.
How to unlock
How to get Sayu in Genshin Shock
Sayu arrived in Genshin Impact as component part of the Banner of Metal Flames on August 10. She'll cost featured alongside boosted rates for early five-star character, Yoimiya, but also Cryo archer Diona, and Pyro claymore-user Xinyan.
Abilities
Sayu's abilities
Here are Sayu's abilities, passives, and constellations:
| Normal | Performs up to quartet consecutive strikes. |
| Charged | Drains staying power to perform spinning attacks against all nearby opponents. The sequence ends with a mighty slash. |
| Plunging | Plunges to the ground below damaging opponents on the room, and dealing AoE impairment on impact. |
| Yoohoo Artwork - Fuuin Pall | If you press, Sayu curls up into a Fuufuu Windwheel and drives a short distance into opponents, dealings AoE Anemo damage. When the duration ends she unleashes a Fuufuu Whirlwind Kick that also deals AoE Anemo damage. If you hold, Sayu rolls continuously and can be oriented, gaining resistance to interruption, and triggering elemental immersion for any elements she comes into contact with. Pressing the skill again ends this state, and Sayu deals a more powerful edition of the Fuufuu Whirlwind Kick. The attainment has a maximum duration of decade seconds, and its cooldown increases based on how overnight Sayu is in Windwheel form. |
| Yoohoo Art - Mujina Flurry | Sayu bidding a pair of helping hands that share Anemo damage to nigh opponents and heal nearby political party members. The amount healed scales on Sayu's round. The skill then summons a Muji-Muji Daruma that takes actions at peculiar intervals depending on the situation. If the HP of nearby characters is above 70% it attacks nearby opponents dealing Anemo damage. If active characters have 70% HP or less, it heals the character with the lowest pct HP. If in that location are no enemies present, it heals active characters even if they have 70% Horsepower or more. |
| Yoohoo Art | Silencer's Secret: When Sayu is in the party, your characters will not start Crystalflies and certain other animals. |
| Someone More Surefooted | When Sayu triggers a Swirl reaction while active, she heals all your characters for 300 Horsepower. She also heals an additional 1.2 HP for every manoeuvre of Elemental Mastery she has. This can be triggered once every two seconds. |
| No Work on Today | The Muji-Muji Daruma created by Mujina Ado gains increased AoE for attacking opponents, and when healing a character, also heals whatsoever other nearby role for 20% of the sum of money. |
| Multi-Task No Jutsu | The Muji-Muji Daruma created by Mujina Flurry ignores HP limits and can buoy both attack and heal at the same time. |
| Egress Preparation | Damage from Fuuin Dash's Fuufuu Whirlwind Kick is increased by 3.3% when pressed. Every 0.5 seconds spent in the Fuufuu Windwheel body politic increases the damage of Fuufuu Whirlwind Kick by 3.3%. The maximum damage increase possible is 66%. |
| Eh, the Bunshin Can Handle It | Increases the level of Munjina Flurry by tercet. Maximum upgrade raze is 15. |
| Skiving | New and Improved: Sayu recovers 1.2 energy when she triggers a Convolution reaction. This effect occurs erstwhile every two seconds. |
| Speed Comes First | Increases the level of Fuuin Dash aside three. Utmost upgrade stratum is 15. |
| Sopor O'Clock | For every point of elemental mastery that Sayu has, the Muji-Muji Daruma created by Mujina Flurry gains 0.2% attack, with a possible max growth of 400%. Every elemental mastery dot also increases the amount cured by 3, with a max increase of 6,000 additional HP. |
Ascension materials

Sayu Ascension materials
Character
Sayu's character ascension materials are the usual Vayuda Aquamarine from the Anemo Hypostasis, and Maguu Kishin from the Maguu Kenki boss. You'll also need two world materials:
- Crystal Marrow
- Whopperflower Nectar
As Crystal Marrow is literally the bone marrow of the Tatarigami serpent you can discover it related to the giant snake skeleton scattered across Yashiori island. Whopperflower-series items are dropped by Whopperflowers of different world levels. They appear all over, but I find the best way to locate same is to go into the enemies section of my Adventurer's Vade mecum and select navigate.
Talent
Here are Sayu's talent ascension materials:
- Whopperflower Nectar
- Teachings of Light
- Gilded Weighing machine
- Pate of Insight
As mentioned, Whopperflower Nectar and its former types are dropped away Whopperflowers of different world levels. Teachings of Light are a reward from the Violet Court domain on Wednesdays, Saturdays, and Sundays.
The Gilded Scale is earned direct the level 70+ Azhdaha boss challenge in the scold domain, and Crowns of Perceptiveness come from seasonal events, and upgrading either the Frostbearing Tree of Dragonspine, operating room the Sacred Sakura of Inazuma.

Source: https://www.pcgamer.com/genshin-impact-sayu-build-banner/
Posted by: moserthiced93.blogspot.com
0 Response to "Genshin Impact Sayu build: Everything we know | PC Gamer - moserthiced93"
Post a Comment